
Why Choose Octo?
We believe infrastructure should be modeled around your application,
not low level cloud resources.
It is much more intuitive to think your App has 3 Regions, vs your cloud needs to be set up with 3 VPCs, 12 Subnets, and hundreds of other low level cloud resources.
Other tools approach infrastructure as a set of cloud resources represented as code.
Octo offers something much more intuitive - Define infrastructure the way you think about your application, not the way cloud thinks about resources.

Developer-Friendly Abstraction
Octo shields developers from intricate low-level infrastructure details. Work with intuitive Models instead of raw cloud resources, making infrastructure accessible to your entire team.
Power of TypeScript
Built with TypeScript, Octo brings type safety, excellent IDE support, and the familiarity of one of the most widely used languages. Leverage existing testing frameworks and tooling.


Graph-Based Infrastructure
Visualize your infrastructure as a well-defined graph of nodes and edges. Understand relationships, dependencies, and changes at a glance.
Reusable Modules & Templates
Shareable and reusable infrastructure components. Import modules, customize templates, and bootstrap your infrastructure in minutes. Community-driven, pre-tested solutions.


Intelligent Change Analysis
Differential analysis at both Model and Resource levels provides simplified and detailed insights into proposed changes. Understand exactly what will change before you deploy.
Cloud-Agnostic Design
Write infrastructure once, deploy anywhere. Octo's cloud-agnostic models work across providers. Currently supports AWS, with more providers coming soon.


Orchestrated Workflows
Octo orchestrates complex infrastructure deployments like a conductor. Coordinate multiple resources, manage dependencies, and ensure everything works in harmony with precise timing and sequencing.
Nurture & Grow Infrastructure
Like a gardener tends to plants, Octo helps you nurture your infrastructure from seed to full bloom. Monitor growth, prune unnecessary resources, and cultivate a healthy, scalable environment.


Multi-Task with Ease
Handle multiple infrastructure tasks simultaneously without breaking a sweat. Octo's graph-based architecture allows parallel operations, making complex deployments efficient and non-blocking.
Customize Your Canvas
Paint your infrastructure exactly as you envision it. Octo provides the canvas and tools, while you create masterpieces tailored to your unique requirements. Flexibility meets creativity.


Built-In Security
Security is not an afterthought. Octo helps you build secure infrastructure from the ground up. Enforce security policies, manage access controls, and maintain compliance standards with confidence.
Server Management Simplified
Manage servers and compute resources with ease. Octo abstracts the complexity of server provisioning, scaling, and maintenance, letting you focus on what matters most — your application.


Supercharged Capabilities
Unlock superpowers for your infrastructure. Octo gives you capabilities that go beyond traditional IaC tools — intelligent modeling, graph visualization, and differential analysis that make you feel like a superhero.
Thoughtful Architecture
Every design decision in Octo is thoughtful and intentional. The architecture encourages best practices, promotes maintainability, and helps you think through infrastructure challenges before they become problems.


Productive Development
Get more done in less time. Octo's intuitive API and powerful abstractions reduce boilerplate, eliminate repetitive tasks, and accelerate your infrastructure development workflow.
Peace of Mind
Experience the zen of infrastructure management. With Octo, you can find tranquility knowing your infrastructure is well-modeled, testable, and maintainable. Less stress, more confidence.

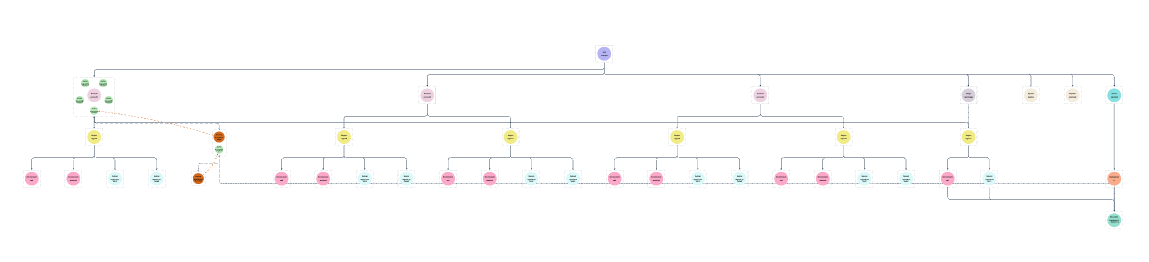
Graphs, Baby! (Coming Soon)
We promised visualization, and its about to become a reality!
With Octo UI you can generate real time graphs of your infrastructure. You can chart models, dive deep into cloud resources, or highlight how different components network together.
Take the guesswork out, and take control of your infrastructure.
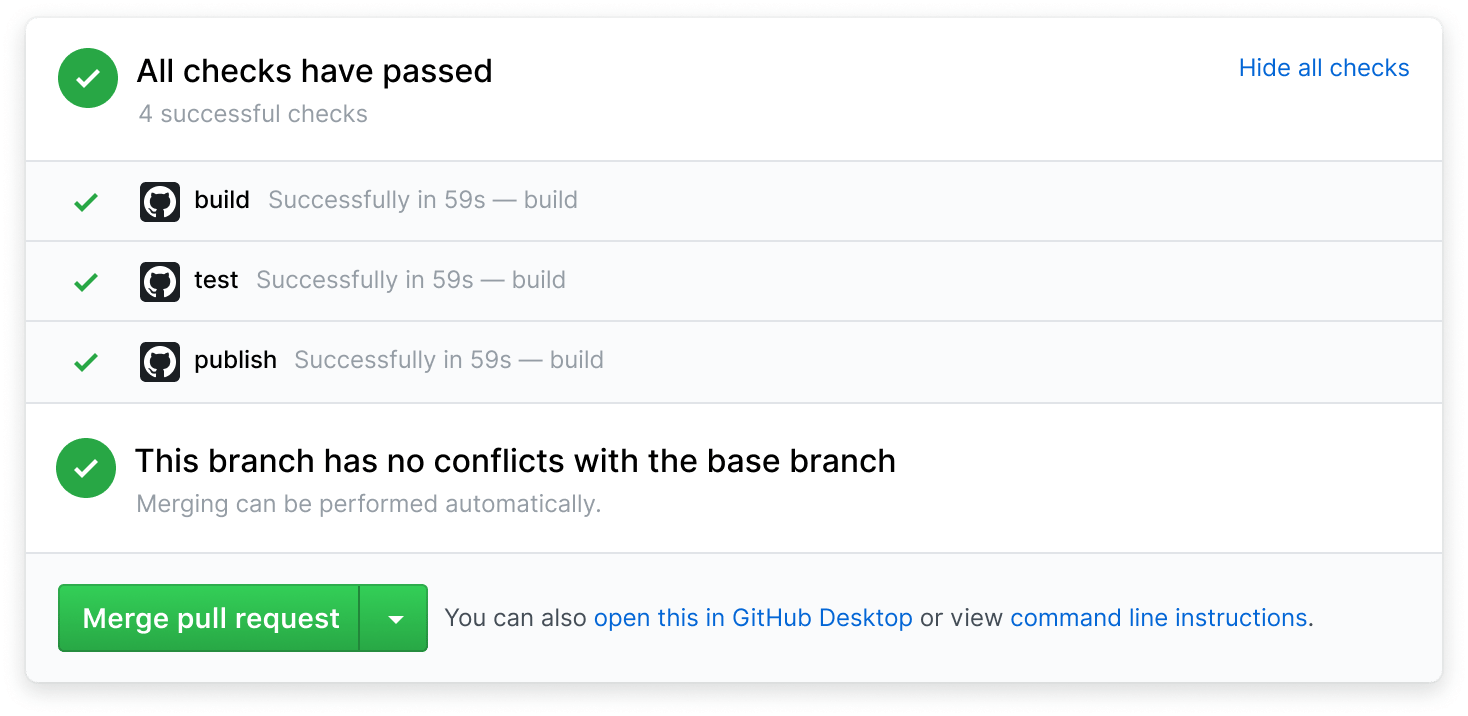
Octo CD Pipeline! (Coming Soon)
With Octo Pipelines your infrastructure changes are just a PR away.
Setup Pipelines to run Octo on every pull request and automatically apply infrastructure changes.
Watch logs. Enforce PR rules. Detailed diffs. HTML Reports. And more!
Support Octo
Octo is an open-source project built with passion and dedication. Your support helps us continue improving and maintaining this tool for the community.
Star on GitHub
Star us on GitHub to show your support and help others discover Octo.
Contribute
Contribute code, documentation, or ideas to help improve Octo.
Join Discord
Join our Discord community to connect with other Octo users and developers.
Share Feedback
Share your feedback, report issues, or suggest new features.